RustyRender: a tinyrenderer implementation in Rust (lesson 0)
May 21, 2022 — 14 minute read — rust, graphics
A few months ago I stumbled upon an interesting project on GitHub called tinyrenderer1. The code is not the interesting part, rather, the wiki is: it’s a tutorial in 10-ish lessons on writing a 3D renderer architecturally similar to OpenGL in about 500 lines of C++. Having grown up playing video games, I’ve wanted to learn more about 3D graphics for a long time. In high school I learned a bit of modeling in Blender and I’ve done some basic stuff in Godot, but I haven’t spent time learning the nitty-gritty details of 3D rendering, so this looked like a perfect way to learn more and improve my low-level programming skills.
Being in the midst of a busy semester, I bookmarked the page and longingly looked back at it periodically, dreaming wistfully of the day I would have enough time to start to work through it. To prevent myself from blindly copy-pasting code and actually learn what was going on, I decided to 1) write everything myself in Rust and 2) write blog posts about the process. After school got out, I began to read the introductory Lesson 0, only to immediately find an issue:
Since the goal is to minimize external dependencies, I give my students just one class that allows working with TGA files.
So students are supposed to make everything from scratch except the library which actually draws the image. That meant I had to port his library for writing TGA files2 myself, use one that someone’s already written, or use a different image format and corresponding library. Plenty of libraries exist that would probably work perfectly, but because my intention was to learn and I’ve never written an image library from scratch, I chose to do things the hard way and got to work porting Dmitry’s code.
The code is stored in two files (a header and a normal code file) which define three types: The TGAImage class as containing the image data, a TGA_Header struct which is directly written as the opening bytes of the final image file, and a TGAColor struct which can hold four 1-byte values and can be used for grayscale, RGB, or RGBA colors.
After creating a new Rust project (cargo new rustyrender), I created a lib.rs file and a tga.rs file and started by defining an Image struct:
// lib.rs
pub mod tga;

// tga.rs
pub struct Image {
    width: usize,
    height: usize,
    data: Vec<u8>,
}
The bulk of a TGA file is the actual image data, which is stored as a sequence of bytes indicating the intensities of the light (for grayscale) or red, green, blue and optionally opacity channels. So a Vec
image.push(0xff);
image.push(0x00);
image.push(0x00);
image.push(0x88);
If this was a grayscale image, it would represent four pixels: one white, two black, and one gray (about 50% intensity). If it were RGBA, it would represent a single 50% opacity red pixel. If it were RGB, however, it would represent a single red pixel and then an incomplete and invalid single byte, and we would have a corrupt image on our hands. That’s why the original C++ code uses a TGAColor struct: we can instead use types that ensure we get valid pixels (not to mention that pushing each byte individually is a bit cumbersome). Because the TGAColor type always holds 4 bytes of pixel data, Dmitry’s C++ code stores a bytespp (or bytes per pixel) value which can be used to specify what color space we’re using. For grayscale, it would be 1; for RGB, 3; and for RGBA, 4:
// tgaimage.h
struct TGAColor {
    // ...
    int bytespp;
    // ...
}
There is an equivalent field for the TGAImage class. A small issue3 with this implementation is that you can still mix and match what color space you use in the image. For example, if we slightly modify the introductory code example from this lesson:
#include "tgaimage.h"
const TGAColor white = TGAColor(255, 1); // This would represent white in grayscale
int main(int argc, char** argv) {
    TGAImage image(100, 100, TGAImage::RGB); // TGAImage::RGB is the integer 3, and sets the bytespp value
    image.set(52, 41, white);
    image.flip_vertically();
    image.write_tga_file("output.tga");
    return 0;
}
Although the white value is created as a 1-byte grayscale white, it renders in the image as a single blue pixel, because our TGAImage object is expecting RGB (scaled up 3x to make the dot visible, hopefully):
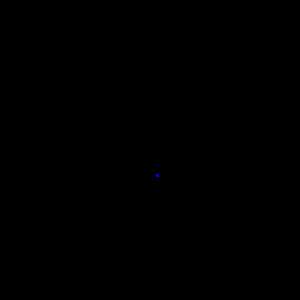
This is because the TGAColor gets represented as four bytes in a row (ff000000) of which the set function (which I’ll explain later) only takes the first 3 bytes because of the bytespp value. That gives us the value 0xff0000, which is actually rendered as blue, because TGA stores red-green-blue data in blue-green-red order.
To require all colors in an image to be the correct type, we can create three color types and make our Image type a generic that can take any of those color types, storing the generic type instead of u8s in the Vec:
pub trait ColorSpace {
    fn new() -> Self;
    const BPP: u8;
}

#[derive(Copy, Clone)]
#[repr(packed)]
pub struct Grayscale {
    pub i: u8,
}
#[derive(Copy, Clone)]
#[repr(packed)]
pub struct RGB {
    pub b: u8,
    pub g: u8,
    pub r: u8,
}
#[derive(Copy, Clone)]
#[repr(packed)]
pub struct RGBA {
    pub b: u8,
    pub g: u8,
    pub r: u8,
    pub a: u8,
}

impl ColorSpace for Grayscale {
    fn new() -> Self {
        Grayscale { i: 0 }
    }
    const BPP: u8 = 1;
}
impl ColorSpace for RGB {
    fn new() -> Self {
        RGB { r: 0, g: 0, b: 0 }
    }
    const BPP: u8 = 3;
}
impl ColorSpace for RGBA {
    fn new() -> Self {
        RGBA { r: 0, g: 0, b: 0, a: 0 }
    }
    const BPP: u8 = 4;
}

pub struct Image<T: ColorSpace> {
    width: usize,
    height: usize,
    data: Vec<T>,
}
That’s a lot of new code, but what’s going on is pretty simple: We have a trait called ColorSpace which requires implementations to have a new() function and a constant which defines the bytes per pixel value for that color. Then we define Grayscale, RGB, and RGBA as structs which define intensities for each color (or just intensity, for Grayscale), then implement the trait by creating functions to instantiate the structs with zeros and define the BPP values. For each struct, we also tell it to use a packed representation, which ensures that the struct will be aligned in memory on single bytes. While my testing shows that the code works without this, the official Rust Reference specifies that user-defined structs have no guarantees about data layout representation, so to be sure, we use the packed representation.
Now that we’ve defined our color types, we can create a method to instantiate an Image with a vector of the correct size:
impl<T: ColorSpace + Copy> Image<T> {
    pub fn new(width: usize, height: usize) -> Self {
        Image {
            width,
            height,
            data: vec![T::new(); width * height],
        }
    }
}
By maintaining the right type in our data vector and instantiating it initially to the correct size, we can avoid mixing color types and ending up with a vector of an invalid length or using a grayscale color value when we meant to use RGB. We can convert this data to a flat array of bits when we save the image.
To actually manipulate this data once we’ve created it, we port the set(x, y, color) function over:
impl<T: ColorSpace + Copy> Image<T> {
    //...
    pub fn set(&mut self, x: usize, y: usize, color: T) -> Result<(), String> {
        if x >= self.width || y >= self.height {
            return Err(String::from("Coordinates out of bounds for image"));
        }
        self.data[x + y * self.width] = color;
        Ok(())
    }
}
This code is almost a one-to-one port of Dmitry’s, with a few exceptions: First, we use usize for our coordinate types so we don’t have check if the value is less than 0; second, we return an error if the coordinates are outside the image boundaries, allowing the caller to decide what to do with that result; and third, we can simply set the value at the correct index to the value of the color parameter rather than using memcpy.
We now have enough to create and modify TGA image data, but not to actually write it to disk when we’ve finished. For that, we need to start by copying a couple of arrays and the footer as well as the TGA_Header struct, which defines metadata for the image:
const DEVELOPER_AREA_REF: [u8; 4] = [0, 0, 0, 0];
const EXTENSION_AREA_REF: [u8; 4] = [0, 0, 0, 0];
const FOOTER: &[u8; 18] = b"TRUEVISION-XFILE.\0";

#[derive(Default)]
#[repr(packed)]
#[allow(dead_code)]
struct Header {
    idlength: u8,
    colormaptype: u8,
    datatypecode: u8,
    colormaporigin: u16,
    colormaplength: u16,
    colormapdepth: u8,
    x_origin: u16,
    y_origin: u16,
    width: u16,
    height: u16,
    bitsperpixel: u8,
    imagedescriptor: u8,
}
Like our other structs, this header needs to be packed into a 1-byte alignment. We also use the #[allow(dead_code)] macro because the Rust compiler will not recognize that these values are being used with the way we write this data to disk. We also use #[derive(Default)] because for several of these fields, we just want zeros, which happens to be the default for all of these types and makes our code cleaner.
Now we can start our write-to-disk function, starting by creating a BufWriter for a file of a name we pass in, and then creating our header4:
impl<T: ColorSpace + Copy> Image<T> {
    //...
    pub fn write_to_file(&self, filename: &str, vflip: bool, rle: bool) -> io::Result<()> {
        let mut out = BufWriter::new(
            File::options()
                .write(true)
                .create(true)
                .truncate(true)
                .open(filename)?,
        );

        let header = Header {
            idlength: 0,
            bitsperpixel: T::BPP << 3,
            width: self.width as u16,
            height: self.height as u16,
            // I'll talk about RLE more below
            datatypecode: if T::BPP == Grayscale::BPP {
                match rle {
                    true => 11,
                    false => 3,
                }
            } else {
                match rle {
                    true => 10,
                    false => 2,
                }
            },
            imagedescriptor: if vflip { 0x00 } else { 0x20 },
            ..Default::default()
        };
    }
}
With the image setup out of the way, we can write a few new functions to write data to the disk:
unsafe fn any_as_u8_slice<T: Sized>(p: &T) -> &[u8] {
    ::std::slice::from_raw_parts((p as *const T) as *const u8, ::std::mem::size_of::<T>())
}

impl<T: ColorSpace + Copy> Image<T> {
    // ...
    fn data_vec(&self) -> Vec<u8> {
        self.data
            .iter()
            .flat_map(|p| unsafe { any_as_u8_slice(p) })
            .copied()
            .collect::<Vec<u8>>()
    }

    pub fn write_to_file(&self, filename: &str, vflip: bool, rle: bool) -> io::Result<()> {
        //...
        out.write(unsafe { any_as_u8_slice(&header) })
            .expect("Error writing TGA header.");
        if !rle {
            println!("writing non RLE");
            out.write(&self.data_vec().as_slice())
                .expect("Error dumping data to TGA file.");
        } else {
            println!("writing RLE");
            //TODO:
            //self.write_rle_data(&mut out)
            //    .expect("Error dumping RLE data to TGA file");
        }
        out.write(&DEVELOPER_AREA_REF)
            .expect("Error writing developer area ref to TGA file");
        out.write(&EXTENSION_AREA_REF)
            .expect("Error writing extension area ref to TGA file");
        out.write(FOOTER).expect("Error writing footer to TGA file");
        Ok(())
    }
}
Using an excellent answer I found on Stack Overflow, we add a function that can convert any Sized type to a raw u8 slice, which is the exact type needed by the write() function on our BufWriter. We do this both with the header and with our image data, iterating over each pixel and making a flat Vec<u8> from it. With these new functions, we can completely write a file to disk, as long as we don’t use run-length encoding (RLE), which we’ll get to next:
// This red value actually works, because we defined the struct order as BGR!
const RED: RGB = RGB { r: 255, g: 0, b: 0 };

fn main() {
    let mut image: Image<RGB> = Image::new(100, 100);
    image.set(50, 50, RED).unwrap();
    image.write_to_file("output.tga", true, true).unwrap();
}
Run-length encoding is a very simple compression algorithm that works by shortening long runs of the same value (e.g. 100 black pixels in a row) into a number indicating how long the run is and the value of the run. The algorithm does this by iterating over ever pixel in the image, comparing it to the next pixel, and deciding if it should be written raw or as a run. If a pixel isn’t part of a run, write 00 and the pixel byte(s). If it is part of a run, continually iterate until the end of the run or until the run length reaches 128 pixels, then write the byte run_length + 127 and the pixel byte(s). Here’s the code:
const MAX_CHUNK_LENGTH: u8 = 128;

impl<T: ColorSpace + Copy> Image<T> {
    // ...
    fn write_rle_data(&self, out: &mut dyn Write) -> io::Result<()> {
        let data = self.data_vec();
        let n_pixels = self.width * self.height;
        let mut current_pixel = 0;
        while current_pixel < n_pixels {
            let chunk_start = current_pixel * T::BPP as usize;
            let mut current_byte = chunk_start;
            let mut run_length: u8 = 1;
            let mut raw = true;
            while current_pixel + (run_length as usize) < n_pixels && run_length < MAX_CHUNK_LENGTH
            {
                let next_pixel = current_byte + (T::BPP as usize);
                let succ_eq = data[current_byte..next_pixel]
                    == data[next_pixel..next_pixel + (T::BPP as usize)];
                current_byte += T::BPP as usize;
                if run_length == 1 {
                    raw = !succ_eq;
                }
                if raw && succ_eq {
                    run_length -= 1;
                    break;
                }
                if !raw && !succ_eq {
                    break;
                }
                run_length += 1;
            }
            current_pixel += run_length as usize;
            out.write(&[if raw {
                run_length - 1
            } else {
                run_length + 127
            }])?;
            out.write(
                &data[chunk_start
                    ..chunk_start + (if raw { run_length * T::BPP } else { T::BPP }) as usize],
            )?;
        }
        Ok(())
    }

    pub fn write_to_file(&self, filename: &str, vflip: bool, rle: bool) -> io::Result<()> {
        //...
        if !rle {
            println!("writing non RLE");
            out.write(&self.data_vec().as_slice())
                .expect("Error dumping data to TGA file.");
        } else {
            println!("writing RLE");
            // Uncommented these two lines to enable RLE
            self.write_rle_data(&mut out)
                .expect("Error dumping RLE data to TGA file");
        }
    }
}
Using xxd and a little arithmetic, we can see RLE in action:
fn main() {
    let mut image: Image<RGB> = Image::new(20, 20);
    image.set(5, 5, RED).unwrap();
    image.write_to_file("output.tga", true, true).unwrap();
}
phin@bolbol:~/programming/rustyrender$ cargo run
phin@bolbol:~/programming/rustyrender$ xxd output.tga
00000000: 0000 0a00 0000 0000 0000 0000 1400 1400  ................
00000010: 1800 e800 0000 0000 00ff ff00 0000 ff00  ................
00000020: 0000 a500 0000 0000 0000 0000 0000 5452  ..............TR
00000030: 5545 5649 5349 4f4e 2d58 4649 4c45 2e00  UEVISION-XFILE..
Our image data starts at that e8 on the second line, which represents the length of the black pixel run starting in the bottom left of the image. We can do a little arithmetic to figure out what length that represents:
phin@bolbol:~/programming/rustyrender$ echo $(($(printf "%d" 0xe8) - 127))
105
That e8 is followed by three 00 bytes, which represent the 000000 for the color black. If you open the TGA file and count the pixels in from the bottom left corner, going to the right and then up, you’ll count 105 black pixels! Those four bytes are then followed by another 00, this time signifying that the following pixel is a single, raw pixel. If we look at those bytes, we have 00 for blue, 00 for green, and ff for red, representing our one red pixel. Next we have two runs of ff and 000000; 0xff - 127 = 128, so we have two max-length chunk of black pixels, then 0xa5 - 127 = 38 more black pixels, for a total of 105 + 1 + 128 + 128 + 38 = 400 pixels, completing our 20x20 image!
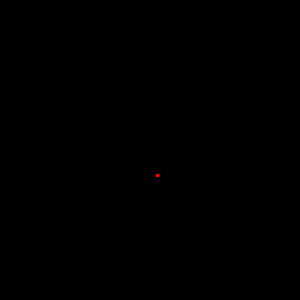
We’re now finally able to copy the example code in Lesson 0 of tinyrenderer5 and get the expected image:
use rustyrender::tga::{Image, RGB};

const RED: RGB = RGB { r: 255, g: 0, b: 0 };

fn main() {
    let mut image: Image<RGB> = Image::new(100, 100);
    image.set(52, 41, RED).unwrap();
    image.write_to_file("output.tga", true, true).unwrap();
}
This post only covers the initial setup for the other 9 lessons in tinyrenderer, so be sure to check out the rest:
- Lesson 1: Bresenham’s line-drawing algorithm
- Lesson 2: To be posted
This list will be updated as posts are added.
Feel free to use the complete source code for this lesson.
-
Written by Dmitry V. Sokolov at the University of Lorraine. ↩︎
-
TGA is an old but simple format that can store images in grayscale or RGB with or without transparency. Dmitry explains why he chose to use it in Lesson 0. ↩︎
-
Which is probably not that important since this is a purely education project, but I felt like using the type system to make things more “correct”. ↩︎
-
I haven’t spent much time trying to understand what exactly is going on here, but the basic idea is that TGA requires a strict set of bytes giving metadata about the image and porting Dmitry’s code works perfectly, so I won’t bother investigating much further. ↩︎
-
One (of probably several) things my implementation may have wrong: instead of having a
flip_vertically()function, we just use the TGA header to specify the image’s origin should be the bottom-left corner using thevflipargument to ourwrite_to_file()function. This works in my limited testing, but may have issues. ↩︎